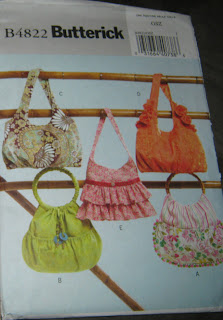
This purse pattern: Butterick 4822 has 5 different purses, this post is for purse E, the ruffle purse in the middle:
I am going to explain what I did to modify the existing pattern but in order to actually make the purse you will have to purchase the pattern from a store- not a big deal, all my patterns I buy when they are $1.00 at Joann's. The rest of this post is operating under the assumption that you have bought the pattern.
I made the purse for my sister Stacey and learned a lot from the first making of it. When I made it a second time I knew what I wanted to modify. Here was Stacey's final purse:
She had beaded fringe that I had found for cheap but it wasn't quite wide enough to cover the ruffle. It is not sewed on in the prettiest way but since it was for family I wasn't too worried about it. The whole thing turned out cute overall.For my second attempt I cut the pattern pieces out about a week before I actually had time to sew it. I used fabric we had lying around (we have TONS of fabric lying around) but I ran out of the main fabric when cutting out the strap. No problem, I just used the lining fabric for the inside part of the strap and it all worked out, as you'll see in the end. The biggest thing about cutting out the pattern is the change I made here:
I like to have a facing so when you press the top edge seems if it is a little off it's not a major deal. Meaning the top half of my lining is the same fabric as the outside of my purse. So instead of one lining piece I cut the top half of my lining to the top cut line shown above and lining fabric from the bottom of the pattern to the bottom cut line. They are an inch apart so I sew the two pieces together with a half inch seam. The "top cut" line I drew is 6" down from the top of the pattern. When sewn together you have this for your lining piece:
I think it makes for a nicer finish. Your interfacing is cut as one piece and goes on the back of this. After cutting all your pieces out and getting your two lining pieces to look like the picture above, you start following the directions.
Already, at step 2, hemming the ruffle, I am going to suggest a change. The pattern calls for you to hem the bottom and sides of the ruffles. I prefer to hem the top and the bottom of the ruffles instead. Reason 1, because you are going to sew the ends of the ruffles into the side seams (trust me), and reason 2, because the top hem is exposed. Even though it is covered, if you lift the top ruffle you can see the top hem of the bottom ruffle. It just looks bad. Hemmed looks much better. So hem the top and bottom of the ruffle as the directions say to do to just the bottom and sides.
Your two sets of ruffles should look something like this:
They don't have to be perfectly even- they are going to be ruffled!
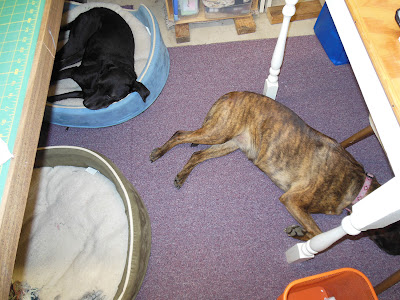
Now you look at your cohorts to see if they are having as much fun as you are:
I think I am having more fun but boy do they look rested. Sometimes I want to cuddle up under there with them. They look so comfy!
The directions in the pattern are pretty straightforward from here. You make gathers in the ruffles, pin them and sew them onto the front and back pieces:
The next change I make comes at step 9, sewing the front and back together. The directions say to not catch the ruffles in the seam but when I made my sister's purse I did one ruffle in and one ruffle out and the one inside looked much cleaner and prettier than the one out. So line 'em up and sew 'em in.
Much cleaner and you'll be happier in the end with the results.
I sewed this part of the purse at my Nana's house but realized I didn't have any ribbon to finish it off over there. I thought I might have some at my mom's but I wasn't sure I'd have anything that would match the pink. So I finished the lining by adding my pocket:
And realized I had to go home to finish the rest of this purse.
Once home I found that I had more ribbon than I thought I did:
But surprisingly, the pretty ruffle ribbon didn't look good on the already ruffly purse. I ended up going with the grosgrain pink ribbon because the stiffness of it really worked the best with the softness of the purse. I did fold in half to make it a little thinner, however, because the full wideness looked too weird. You have to sew on the ribbon and decorative button or however you want to decorate your purse before you sew the purse and lining together. The ribbon is basically there to cover your stitches where you sewed the ruffle to the bag.
My strap was sewn together with the lining fabric on the inside and the main fabric on the outside:
Apparently by the cutting board I did that at my Nana's as well. This was just a picture to see that you don't have to use the same fabric on both sides of your strap.
Finally, you can simply follow the rest of the directions. When I finish off a purse I have the outside shell of the bag right side out, pin the straps how I want them, then stuff it into the lining of the bag so right sides are together, then repin the straps.
 | ||
| Blurry picture of straps between shell and lining |
First pin your sides, then your middles then the betweens around the edge. It helps distribute the fabric around the circle:
You can see my magnetic snap closures, I like to back them with extra fabric or interfacing to give them strength- the magnets are really strong. You have to put them on your lining before you finish, usually when you put the pocket on. They are super easy to install and I bought a bunch in bulk so I use them all the time.
Anyway, now it's time to sew around the edge of the purse there on the top. You turn it right side out, sew up the hole in your lining, shove your lining in the bag and you are almost done! The directions say to sew on the button now but you should have done that back when you sewed on your ribbon. Press your top seam, getting it as nice as possible, the seam at the very top of the purse. Then top stitch about a quarter inch all the way around the purse. It isn't in the directions but I always think a nice top stitch looks neater than no top stitch.
And voila! You have a cute ruffle purse.
Once you make one you'll want to make more! They are fairly quick, I made this in a few hours. I think they are so cute!
If you have any questions or need clarification just comment below and I'll try to answer.
Off to sew some other purses while watching one of my favorite TV shows, Falling Skies. I hope to post more tutorials/pattern adjustments here in the future!


0 comments:
Post a Comment